

I am thrilled to share my latest creation with you - the Fairy Tale Printable Set!, I poured my heart and soul into creating this set. Whether you use them for home decor, scrapbooking, or other creative projects, I hope these prints bring a touch of enchantment to your life. In this blog post, I'll share one of the many ways you can use this set to create a unique and beautiful decor.
I first made the frame using Amazing Casting Resin and the Frames Mould. Will this was setting up i started painting the canvas
So, I just painted a 5 x 7 wood canvas with Fusion paint in the color Inglenook, and it turned out great! Here's how I did it:
Step 1: I chose a 5 x 7 wood canvas as my painting surface. I prefer wood canvases over regular canvases because they tend to hold up better over time and don't sag like their cloth counterparts.
Step 2: I selected Fusion paint in the color Inglenook as my paint of choice.

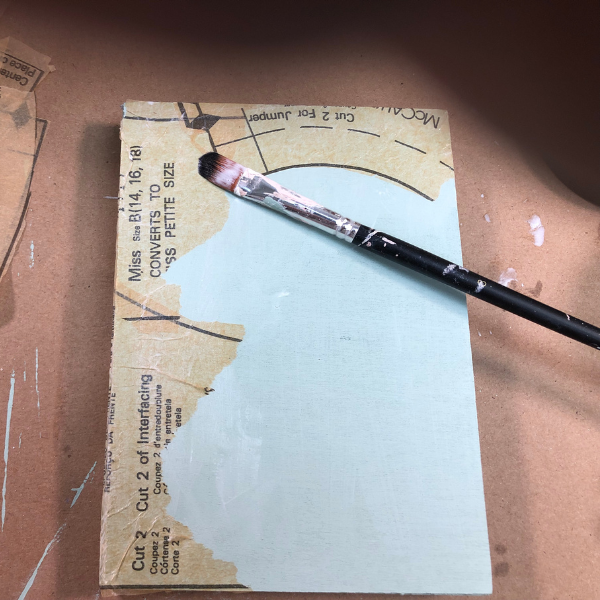
Next, I added some texture and interest by decoupaging sewing patterns randomly on the canvas. I made sure not to fill in the middle because that is where the frame or picture is going.
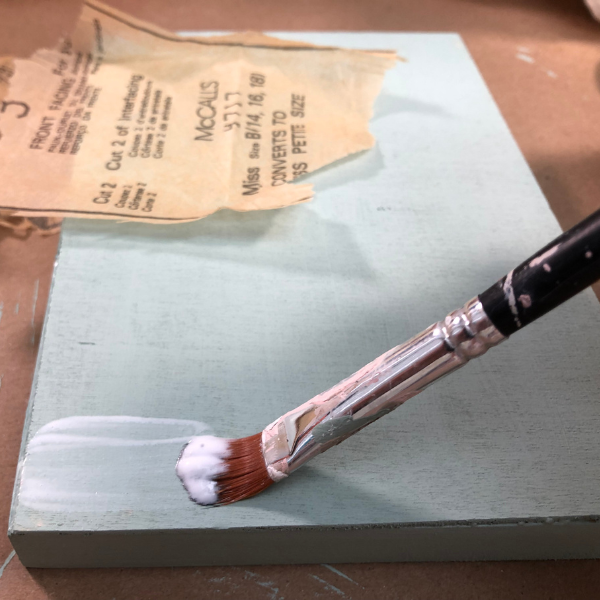
After decoupaging the sewing patterns onto the wood canvas, I decided to add some more texture and color to the piece. To do this, I used the dry brush technique and applied some white and pink paint onto the canvas. The idea behind this step was not to cover up the patterns, but rather to add some additional texture and color.
To use the dry brush technique, I first dipped my brush lightly into the paint. Then, I wiped most of the paint off onto a paper towel, leaving just a small amount on the brush. Next, I lightly brushed the paint over the canvas in a random, uneven pattern. This technique allowed me to create a subtle, almost transparent effect that added some depth and interest to the piece.


After completing all the steps on the wood canvas, it was time to move on to the frame. I had previously made a frame using the Amazing Casting Resin, and now it was ready to paint. For this step, I chose to use Peony by Fusion paint, making sure to get into all the nooks and crannies of the frame.
Once the paint had dried, I was ready to attach the printable to the back of the frame. I used a strong glue to ensure that it would hold securely. Carefully, I positioned the printable onto the back of the frame and pressed it into place.


With the printable securely attached to the back of the frame, the final step was to attach the frame to the canvas. For this, I chose to use construction adhesive, which is known for its strength and durability.
To begin, I applied a generous amount of the adhesive to the back of the frame. Then, I carefully positioned the frame onto the wood canvas, making sure that it was centered and level. I pressed down firmly on the frame to ensure a good bond, and then let it dry completely according to the adhesive's instructions.

To give this project a vintage look, I decided to use dark wax in the color brown by DIY. Working in small sections at a time, I applied the wax using a brush, making sure to get it into all the nooks and crannies of the piece. Once applied, I used a lint-free rag to wipe off any excess wax, leaving just an aged effect.
When working with dark wax, it's important to note that your project should be sealed first. However, because the Fusion paint I used already has a built-in sealer, I didn't have to take that extra step.


The final and last step was to add a hint of gold paint i used vintage gold again by Fusion. I applied it with my fingers just to enhance the texture in this frame


Beautiful artwork for your home, and by using a few simple techniques, you can turn them into something truly unique and special. This project was a lot of fun to create, and I'm really happy with how it turned out. I hope this tutorial has inspired you to create your own DIY art projects using printables, paint, and other materials. Remember, the possibilities are endless when it comes to crafting and creating, so don't be afraid to experiment and try new things.

Products I used
YouTube Video
More About Printables
Printables are essentially digital files that you can download and print at home.
Framing them: As I did in this project, you can print out a favorite design and frame it for a quick and easy art piece.
Using them in scrapbooking: Printables are a great way to add some unique and interesting elements to your scrapbook pages. You can print out patterned paper, journaling cards, and other design elements to use in your layouts.
Making cards and invitations: If you're in need of some custom cards or invitations, printables can be a great solution. You can find more printable designs on our website
Tips for displaying your DIY vintage wooden canvas frame
- Once you've completed your frame, you'll want to find the perfect place to display it in your home. There are countless ways to showcase a beautiful piece of artwork like this, but here are a few ideas to get you started:
Hang it on a gallery wall: If you have a collection of artwork that you'd like to display together, consider creating a gallery wall. This is a great way to showcase multiple pieces of art in one cohesive display. To hang your wooden canvas frame on a gallery wall, use a picture hanging kit or some small nails or screws to secure it to the wall.
Prop it up on a mantle: If you have a fireplace mantle or a shelf that could use a little visual interest, try propping your wooden canvas frame up on it. This works particularly well if you've added some height to your frame with the decoupaged paper or other embellishments.
Use it as a centerpiece: If you have a large table or an empty space that needs some visual interest, consider using your wooden canvas frame as a centerpiece. You could place it on a tray with some candles and other decorative elements, or use it as a backdrop for a vase of flowers.